Generating a Base Image

This lab is centered on the generation of a Base Desktop Image. Note: the lab demo does not reflect the amount of time necessary to complete the entire process.

The environment has been pre-configured to assist the student with completing the lab. To complete this lab, the ADDS/DHCP server and Windows 7 guest machines must be powered on, and the student has configured the VDI Manager to communicate with the vSphere hypervisor (Hypervisor Grid Configuration). Importing a VM into VDI-in-a-Box is a lengthy process. The image that is imported into the VDI-in-a-Box grid will be the Master Desktop Image that all desktops will be built from to create a desktop template. When prompted, the student will enter the Administrator Credentials for the Windows 7 VM.

The lab demonstration will reflect an IP address for the Windows 7 machine within the scope of 10.1.1.10-254. Each student may have a different IP address for the Windows 7 guest machine as it is configured as a DHCP client. If your Windows 7 guest machine does not get an IP address, ensure that the DHCP server (VM) on the ESXi host is powered on.

To reinforce the concept that the Master Image is a working machine, we recommend Remote Desktop Connections should be established during the Edit Image step. Caution should be used not to close the wrong window, otherwise the student may need to completely log back into NETLAB+. It should be stressed to the student to continually ask themselves, “Where am I?” By focusing their attention to which window they are operating in. Many students may feel overwhelmed with the number of open Windows or Consoles controlling a number of different machines.

Generate a Base Desktop Image

Generate a Base Desktop Image

Capture 2 Step 2

Capture 2 Step 2

Capture 3 Step 3

Capture 3 Step 3

Capture 4 Step 4

Capture 4 Step 4

Capture 5 Step 5

Capture 5 Step 5

Capture 6 Step 6

Capture 6 Step 6

Capture 7 Step 7

Capture 7 Step 7

Capture 8 Step 8

Capture 8 Step 8

Capture 9 Step 9

Capture 9 Step 9

Capture 10 Step 10

Capture 10 Step 10

Capture 11 Step 11

Capture 11 Step 11

Capture 12 Step 12

Capture 12 Step 12

Capture 13 Step 13

Capture 13 Step 13

Capture 14 Step 14

Capture 14 Step 14

Capture 15 Step 15

Capture 15 Step 15

Capture 16 Step 16

Capture 16 Step 16

Capture 17 Step 17

Capture 17 Step 17

Capture 18 Step 18

Capture 18 Step 18

Capture 19 Step 19

Capture 19 Step 19

Capture 20 Step 20

Capture 20 Step 20

Capture 21 Step 21

Capture 21 Step 21

Capture 22 Step 22

Capture 22 Step 22

Capture 23 Step 23

Capture 23 Step 23

Capture 24 Step 24

Capture 24 Step 24

Capture 25 Step 25

Capture 25 Step 25

Capture 26 Step 26

Capture 26 Step 26

Capture 27 Step 27

Capture 27 Step 27

Capture 28 Conclusion

Capture 28 Conclusion

To view a complete demo click here.


Hypervisor Grid Configuration

During this lab we will configure VDI-in-a-Box™ to communicate with the VMWare® vSphere™ or other hypervisor and begin to create the virtual grid. This process is required preparation to manage the guest machines within the ESXi™ host. Note: the demonstration piece dose not reflect the actual time needed to complete this step within NETLAB+.  The time required to create the virtual image is largely dependent on the size of the physical image used in building the virtual machine.  It is extremely important to glean the image of unnecessary applications, snap-ins, and operating system add-ins.

VDI-in-a-Box™ can be deployed in a few hours if preparation and planning has been done well in advance, including built-in, policy-based dynamic desktop provisioning, load-balancing and connection brokering. A grid architecture automatically shares configuration and desktop images, and enables management of all servers as a single entity, so IT can focus on managing centralized desktop images instead of individual end points. A wizard driven, point-and-click user interface abstracts virtualization details so a Windows administrator can set up and manage virtual desktops without any virtualization, SAN or datacenter expertise. The desktop agent is automatically installed whenever a master image is created or updated, saving administrators time.

Below are the step-by-step instructions and I have created a video that can be viewed online.

Capture 1 Lab6. Configure Hypervisor and VDI Grid

Capture 1 Lab6. Configure Hypervisor and VDI Grid


Capture 2 Lab6. Step 1 - Configure Hypervisor

Capture 2 Lab6. Step 1 – Configure Hypervisor


Capture 3 Lab6. Step 2 - Enter Hypervisor Administrative Credentials.

Capture 3 Lab6. Step 2 – Enter Hypervisor Administrative Credentials.


Capture 4 Lab6. Step 3 - Verify Credentials and Click Next.

Capture 4 Lab6. Step 3 – Verify Credentials and Click Next.


Capture 5 Lab6. Step 4 - Select The Images Datastore Location.

Capture 5 Lab6. Step 4 – Select The Images Datastore Location.


Capture 6 Lab6. Step 5 - Choose Datastore From Dropdown.

Capture 6 Lab6. Step 5 – Choose Datastore Location From Dropdown.


Capture 7 Lab6. Step 6 - Datastore Location.

Capture 7 Lab6. Step 6 – Datastore Location.


Capture 8 Lab6. Step 7 - Choose VM Network Location From Dropdown.

Capture 8 Lab6. Step 7 – Choose VM Network Location From Dropdown.


Capture 9 Lab6. Step 8 - Select Next To Save And Continue.

Capture 9 Lab6. Step 8 – Select Next To Save And Continue.


Capture 10 Lab6. Step 9 - Create New VDI-in-a-Box Grid.

Capture 10 Lab6. Step 9 – Create New VDI-in-a-Box Grid.


Capture 11 Lab6. Step 10 - Select Next To Save And Continue.

Capture 11 Lab6. Step 10 – Select Next To Save And Continue.


Capture 12 Lab6. Step 11 - Choose VDI-in-a-Box Workgroup Option.

Capture 12 Lab6. Step 11 – Choose VDI-in-a-Box Workgroup Option.


Capture 13 Lab6. Step 12 - Select Next To Save And Continue.

Capture 13 Lab6. Step 12 – Select Next To Save And Continue.


Capture 14 Lab6. Step 13 - Verify IP Address Assignment.

Capture 14 Lab6. Step 13 – Verify IP Address Assignment.


Capture 15 Lab6. Step 14 - Click Done To Save And Continue.

Capture 15 Lab6. Step 14 – Click Done To Save And Continue.


Capture 16 Lab6. Conclusion.

Capture 16 Lab6. Conclusion.


Accessing VDI Management Server

During this lab exercise students will learn how to communicate with the VDI Management Server. The VDI Management Server is a virtual machine installed on the ESXi Server.  See my last post for Accessing The ESXi Host.

VDI-in-a-Box™ is a Citrix® product designed for IT organizations with simpler needs. VDI-in-a-Box provides personalized desktops where users can install their own application and store their configuration and data. These personalized desktops are generated from a master image providing the best of both worlds: users get personalized desktops while desktop administrators manage a single master image.  In my future posts I will describe the process of creating and preparing the master images that will be imported into the VDI grid within VDI-in-a-Box™.

The VDI Management Server is accessed securely through a web browser allowing the Windows Desktop Administrator remote management. The VDI Management Server uses a static IP Address of 10.1.1.5/24, which has already been configured for the student (see Accessing The ESXi Host).  Obviously, the network address and static IP address assignment would be different in your network.  As mentioned in earlier posts, the network is 10.1.1.0/24 for simplicity.  Below is a step-by-step walk through to access the VDI Management Server.  I have also posted the entire demonstration on YouTube.

Capture 1 Lab5 - Instructions

Capture 1 Lab5 – Instructions


Capture 2 Lab5 - Step 1.

Capture 2 Lab5 – Step 1. Select Internet Explorer from your taskbar.


Capture 3 Lab5 - Step 2.

Capture 3 Lab5 – Step 2. Change the URL to match the statically assigned IP address of the VDI Management Server.


Capture 4 Lab5 - Step 3.

Capture 4 Lab5 – Step 3. Press the Enter Key after entering URL.


Capture 5 Lab5 - Step 4.

Capture 5 Lab5 – Step 4. Website certificate security warning.


Capture 6 Lab5 - Step 5.

Capture 6 Lab5 – Step 5. Enter administrator credentials to log on.


Capture 7 Lab5 - Step 6.

Capture 7 Lab5 – Step 6. Use default credentials for initial log on.


Capture 8 Lab5 - Step 7.

Capture 8 Lab5 – Step 7. Welcome screen overview.


Capture 9 Lab5

Capture 9 Lab5


Accessing The ESXi Host

To be clear, I have included the below image as a map, or topology, of the environment that is being described in this process.  Let’s examine the two items in the image.  The Win7 VDI Management machine is simply a PC that is running a Windows 7 operating system and the second machine is the Host machine that is running VMWare® ESXi™ as its operating system.  The Host is where all of the Virtual Machines (VM’s) will be stored.  The link between the Win7 VDI Management machine and the ESXi Host can be any type of media (i.e., Ethernet, Fiber, etc.) connection to establish a communication link between the two machines.

Topology Diagram

Topology Diagram

Communication between the Win7 VDI Management PC, (I will refer to as the Management PC), and the host is managed through a Hypervisor.  A hypervisor or virtual machine monitor (VMM) is a piece of computer software that creates and runs virtual machines.  The Host can have one or more virtual machines, also referred to as a guest machine.  The hypervisor called a Type 1 native, or bare metal hypervisor, runs directly on the host’s hardware to control the hardware and to manage the guest operating systems.  This feature allows guest machines to have different operating systems other than the host.  For example, depending on the resources available to the host, there can be VM’s running Windows XP, Windows 7 & 8, as well as Linux all running simultaneously and independently from one another.  The hypervisor used in this example is VMWare® vSphere™.

Let’s assume that the network is 10.1.1.0/24 and the two machines are assigned static IP addresses.  For simplicity, the ESXi Host will be 10.1.1.1 and the Management PC is 10.1.1.2.  Additionally, I have pre-loaded VM’s on the host to simplify the explanation.  Normally, administrators would need to import or build their individual VM’s.  This exercise is not about building VM’s, rather, how a communication session is established between the Host and Management machine.

Secondly, to better understand that virtual machines perform as they were physical machines, you will learn to communicate directly with those machines from the management workstation using CLI (Command Line Interface) commands like PING. This session is used to reinforce the concept that VM’s perform as though they are physical machines in responding to communication requests.

Each machine will respond to the ping requests to illustrate that network communications are established within the 10.1.1.0/24 network. Additional CLI commands could be demonstrated during this session although they are not covered in the lab.  Throughout the lab additional definitions and concepts are introduced such as Host, Active Directory, DHCP, and Consoles. These concepts will be explored in more advanced topics.

Using the attached portable document file (pdf), I have provided a detailed explanation of using VMWare® vSphere™ to communicate and control the host.  You will need the latest version of Adobe Flash and Adobe Reader to access.  This is an interactive demonstration that will require you to click on active content to follow the demo.  Please use the controls at the bottom of the demo to play, rewind, or forward through the demo or follow the directions in the demo to interact with the process.  There is no sound.  The format may not work in all browser’s (i.e., Chrome, Safari).  As an alternate I have also posted this as a video on YouTube by clicking this link: vSphere Management

vSphere_Management (download)


Virtualization In IT

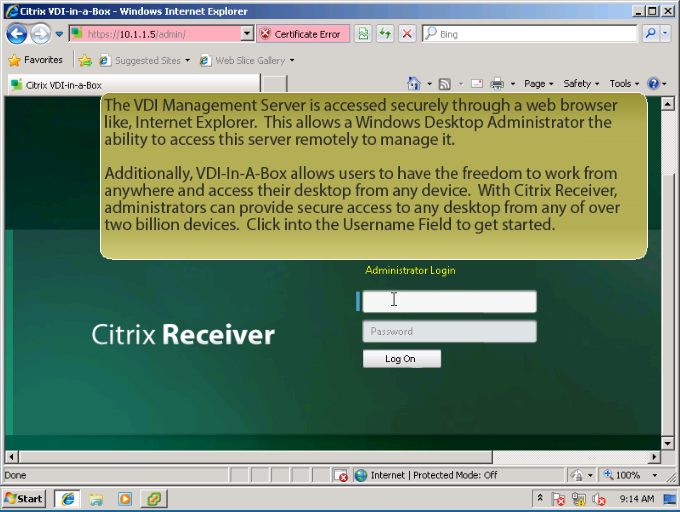
Yesterday I discussed Virtual Desktop Infrastructure (VDI) with Citrix® VDI-in-a-Box™.  To demonstrate VDI-in-a-Box™, I needed to create a virtual environment.  As I mentioned in my earlier post, VDI-in-a-Box™ runs on an industry standard server.  The specific technical needs for the server vary from organization to organization so I will not go into the specific technical requirements necessary to build out the virtual environment.   Citrix® VDI-in-a-Box™ makes the benefits of desktop virtualization available to businesses of all sizes.  It is not as important for you to fully understand all the inner-working processes as it is for your understanding of the concepts of desktop virtualization.  My goal is for you to realize the potential of using Citrix® VDI-in-a-Box™ and the many possibilities that cloud computing and desktop virtualization offers businesses that employ this type of technology.

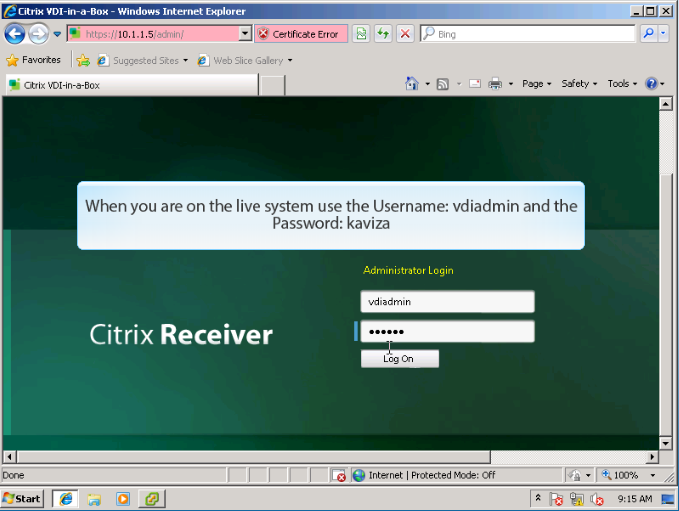
The learning objective is for you to learn how to manage Citrix® VDI-in-a-Box™ through the VDI management console.  The following posts will include the setup, configuration, and deployment of a typical Workgroup environment in a small business.  In my environment, I am completely virtual.  However, the virtual environment performs exactly like the physical.  This means that by the end of my posts for this topic, you could begin to install these products yourself.  This is also an introduction to VMWare® ESXi™, VMWare® vSphere™ which I will discuss later. Citrix® VDI-in-a-Box™ will allow you to gain valuable insight and get a head start towards VDI.

Cost savings are just one of the many advantages of virtualization.  Improving server utilization means you need fewer physical servers.  Given that hardware eats up 40 percent of the average IT budge for businesses with fewer than 1,000 employees, virtualization can save your organization big money.  Improving server and application management can also reduce the personnel time required for IT management, which further reduces costs.  Additionally, when it’s time to refresh the physical hardware, you typically will get better return on your investment through virtualization.

According to the United States Department of Labor, Computer and Information Systems Managers are among the top 20 highest paying occupations. Employment of computer and information system managers is projected to grow 18 percent from 2010 to 2020, and growth will be driven by organization upgrading their IT systems and switching to newer, faster, and more mobile networks.

Just test the water by visiting some of the top employment Websites; Monster.com, Careerbuilder.com, Indeed.com, and TheLadders.com. Searching on keywords like VMWare Certified Professional, Citrix Certified Administrator, Computer Systems Design, Computer Systems Analysts, Network and Computer Systems Administrators, and Information Security Analysts. According to the Department of Labor each of these occupations range in pay from $69,160 to $77,740 (2010 median pay).

Gartner Research has indicated that cloud computing is an important and disruptive long-term force in the industry, with a significant potential for impact on every aspect of IT, the business and how users access applications, information and business services. Gartner makes further predictions that by 2014, IT organizations in 30% of Global 1000 companies will broker (aggregate, integrate and customize) two or more cloud services for internal and external users, up from 5% today.

Although there are varying degrees of server virtualization progress, server virtualization initiatives could be considered a “work in progress” today, and most organizations are planning aggressive implementations over the next few years. Server virtualization’s early roots were as a technology for software development and testing; it is now used extensively in IT production environments. When server virtualization progresses from test/development to production, most organizations start by virtualizing simple Windows workloads. As they gain experience with virtualization technology, they progress to more complex applications.

Citrix® VDI-in-a-Box™ is designed for IT organizations with simpler needs, VDI-in-a-Box makes it easy to deliver centrally managed, personalized virtual desktops securely to any device on any network all for less than the cost per user of new PC’s. Another advantage to using Citrix® VDI-in-a-Box™ is allowing Windows administrators to handle virtualization with a single intuitive management console, eliminating the need for storage specialists, network administrators, database administrators or virtualization experts.

Using Citrix VDI-in-a-Box

Over the next few posts, I will be explaining and demonstrating a product from Citrix.  A term that has been a buzz word in the IT community is, BYOD (Bring Your Own Desktop).  One problem that many small and medium sized businesses face are IT costs.  One cost is associated with the physical desktops within their organization and another is the support of those physical machines.  It takes money to buy new equipment and employ those that support that equipment.  Keeping up with the demands of IT can increase costs exponentially for a small business owner.  The progressive need to refresh equipment, and ensure that the support staff has the technical acumen to support the infrastructure, drives the role of the IT staff from developing new solutions to continually supporting and maintaining the infrastructure.  This perpetual cycle has a damaging effect on the business.

One solution is to offer a Virtual Desktop Infrastructure (VDI).  Virtualization occurs when virtual versions of computer resources are created on a Host.  A thin layer of software called a Hypervisor is what makes this isolated communication possible between the Host and the VM.  The virtual machine or VM, is a tightly isolated software container with an operating system and applications inside.  Imagine a folder with files contained within it, completely portable.  You can have virtualized operating systems, virtualized desktops, virtualized servers, virtualized storage, or virtualized network resources.  More importantly, all of these virtualized resources can be used as effectively as physical resources to run business operations.

Citrix VDI-in-a-Box is an all-in-one VDI solution that delivers personalized virtual desktops securely to any device on any network.  Available as a virtual appliance, VDI-in-a-Box runs on industry standard servers and eliminates the need for expensive data center infrastructure.  I will continue to post step-by-step instructions on using VDI-in-a-Box in a workgroup and active directory environments and I invite your questions or comments as I do so.