World Password Day

“[The] cyber threat is one of the most serious economic and national security challenges we face as a nation.”

–President Barack Obama

The fact of the matter is that we are now more connected to technology than ever before.  This is not a single generational issue either.  According to DHS, as of April 2012, 53% of Americans age 65 and older use the Internet or email.  While the Internet brings many conveniences that are hard to live without, it also comes with an increased risk.  Cybercriminals are using very sophisticated techniques to appear legitimate.  I’ve posted in the past on cyber scams that use social-engineering ploys to lure the unsuspecting into revealing passwords and even access to their personal computers.

Email is one of the ways cyber criminals target victims.  Simplicity and cost-effectiveness are the reasons cyber criminals use this medium.  More than 1 in 20 will click on an embedded link within an email message.  Mass emails can be sent with a click of a button that look very legitimate; they pose as friends or family members, banks, charities, mortgage vendors, healthcare and low-cost prescription providers, and even the IRS to steal information in order to conduct identity theft.  These email scams, or more commonly referred to as phishing schemes, are linked to credit card fraud and more.

As a part of this month’s initiative to bring a heightened awareness to cybersecurity, experts recommend this month as a reminder to change your passwords.  Following the tips below can help you make safer and smarter decisions online:

  • Passwords should be kept secret – that means you only!
  • Password complexity is important (i.e., upper and lower case letter, numbers, and special characters) however, length is even more important – strong passwords have a minimum of eight characters or more.
  • Some Websites allow you to turn on Two-factor password protection.  Although, it takes a little more to log into a site, it adds an additional layer of protection.
  • Limit your personal information on social media site.  If your pet’s name is Toto, and you have lots of pictures of Toto online, it may not be the best secret question to use.
  • Most reputable businesses (i.e., banks, credit card companies) will not ask you to verify your information via email.  Before you reveal anything, call your bank or credit card company from the number on the back of your card to verify your information.

Some other tips to avoid in email:

  • Avoid clicking on links, or responding to email messages from unknown senders.
  • If you don’t know the sender delete the email – don’t even open it.  I would rather get a call from a friend/ co-worker that asks me if I got the email, and have them resend it.  Be sure to ask them what email address it would be coming from so that you can recognize it.
  • If you get an attachment in an email, scan it with Anti-virus software first.  Don’t just launch it from the email.  Some of the worst spyware – malware, may load even though it appears to do nothing when you click to open it.

Tips for your computer:

  • The term, “Hardening your system” usually refers to updating your computer with the latest software patches.  Be sure to turn on Windows Automatic Updates to automatically install updates.
  • Passwords are just as important on your personal computer at home as the portable device you may carry.

Be safe – change your passwords often!

Mobile Security

Mobile Phone Security – Things to Consider

In business, data security is a continual concern.  The migration of systems into the cloud creates several of its own concerns.  Most people that are using technology have a basic understanding why it is important to keep their information safe.  However, there is a gap between understanding what is necessary and actually doing what is necessary to protect yourself from cyber hackers.

Just the other day someone I know said to me, “What are they really going to get?  They can have what I’ve got on the computer, there is nothing on it.”  Needless to say I was again stunned at his level of understanding at protecting his own personally identifiable information (PII).  More astounding, is how common this attitude is.  Many people lack the basic level of understanding of security when it comes to their cell phones.  Everyday I witness people accessing banking sites, corporate email servers, and other websites over free public WiFi locations like Panera Bread, McDonald’s, and hotel lobbies.

In the very recent past, the primary concern many companies were facing was losing a company cell phone or other portable electronic device (PED).  In fact, one of the top threats for companies is that end user’s fail to follow security policies and procedures with their mobile devices.  Many people outright disable features that their company has set up for them.  For anyone that has a smart phone, tablet, or laptop they will quickly realize the benefits of portability.  PEDs are not only more portable, they are also more desirable to carry around than the laptop.  Just a few years ago, losing one of these devices was more of an annoyance because of the time, energy, and the cost to replace it.  However, if this device was owned by a major corporation or government agency, it represented a serious security breach.  It wasn’t the cost of the device they were concerned about.  The concern was the confidential corporate data stored on the device like customer information, corporate emails, proprietary information, etc.  For individuals, the same still holds true.  Nowadays, it seems people are more connected to their smartphone than to their spouse or children.  One doesn’t have to look far in a restaurant to see people sitting across from each other looking down at their phone. Every app, many of which users save their passwords into, is a potential breach.  Think about what you have stored in your phone and what is connected through your phone.

Getting started with mobile security does not have to be a costly endeavor.  Most companies install some form of tracking software at the minimum so that they can locate and remotely wipe the device.  However, research from leading security firms show that mobile security still has a very long way to go.  As more people store their information in the cloud and on their PEDs the increased risk of a breach is always present.  What comes with portability is the increased risk of device theft because of its small size.

Here are a few basic actions you may want to consider to increase your mobile security:

  • Install tracking/wiping software
  • Require a passcode on the mobile device
  • Use encryption on the mobile device
  • Engage a third party that will monitor your mobile device
  • Read the terms of use on apps you install
  • Uninstall apps you no longer use
Cyber Crime

Got Hacked? The Tell-Tale Signs

This is a question many people cannot answer. Some answer this question with a question, “What are they going to steal from me?” Another really good answer people have given me doesn’t answer the question at all, it reaffirms that they don’t have a clue; “I don’t do anything on the computer other than surf the web.” The fact of the matter is, every computer can get hacked if it is connected to the Internet. The Internet is a web of interconnected devices. If you think just staying disconnected will help, think again. Everyday we connect a plethora of devices to our computers; USB sticks, Camera’s, Cell Phones, and other memory sticks just to name a few. Any device that can store and transmit data can carry a virus or other form of malware. Remember that before the Internet, people got a virus by putting a floppy disk into their PC and tried to run or open a file that was stored on it.

Does antivirus (anti-malware) help? The short answer is yes. However, your antivirus program is only the first step. The fact that you may have antivirus installed on your computer does not guarantee that you will not get an infection. Most antivirus programs are only trying to keep up with the deluge of malware that is written every day. Antivirus programs use a “signature” or heuristic that attempts to recognize the malware. This means that the virus has already been written and released. Antivirus software companies like Symantec, McAfee, Kaspersky, and Bitdefender all use a network that alerts them to problems and they begin the process of writing a defense to it. Your computer gets an update to protect the system from the outbreak. Think of a human virus when we get sick. Its our white blood cells that attack the virus as a defense mechanism against the virus. If our immunity is low or the type of virus spreads rapidly we get sick. Some medication works, other times we visit our doctor to get a stronger prescription. Most of the time this fixes our issues and others we have to take a more aggressive approach to get well. According to Kaspersky Lab released its annual Kaspersky Security Bulletin, which provides the overall malware and cyber-threat statistics each year. At present Kaspersky Lab detects more than 200,000 new malicious programs every day. They are not alone Symantec, Microsoft, and McAfee are doing the same.

I’ve outlined here several signs that you’ve been hacked. Just like listening to our own bodies, our computers will reveal things that can alert us to the fact that it is not doing well. First and foremost backup your files (documents, pictures, videos, favorites, etc.). Secondly, the number 1 recommendation to resolve any breach in your system is to completely restore your system to a known good state. Restore points are not always a viable option if you have backed up the virus! A complete system recovery of a compromised computer is the best option.

One of the most common signs that you’ve been hacked is Internet searches getting redirected. For example, you open up your favorite browser and notice that you are looking at an unknown message or webpage. Sometimes this happens when you type a search and are completely redirected to a completely different site. Many hackers make their living by getting paid for clicks to appear on someone else’s website. Unwanted browser toolbars are another indicator that your browser has been hacked. These unknown toolbars may be watching your Internet activity or worse recording every keystroke that you make. Most toolbars will allow you to remove and uninstall them. When in doubt uninstall it.

The topic of antivirus may be on your mind like it is to so many people. Unfortunately, many people don’t know what they have. Because of this, it causes them to be duped into scams with fake antivirus messages. A common scenario while you browse the web, you are alerted that your computer is infected and a scan is required. “Click Ok” to continue or “Click Cancel.” Clicking cancel usually doesn’t work. The message continues to appear until you finally click the Okay button. While this seems to be scanning, the program is actually installing on your computer and many times disabling your existing antivirus program if you have one. Next thing you notice is the messages telling you how many virus items were detected and for a fee they can be removed. Many user’s input their credit card numbers unknowingly and the detected items are removed. This process may go on and on. Worse, your credit card information is sold, your accounts jeopardized, and your personal information at risk. Take Action! There are a few things you can do. First you can close the active window by pressing the Alt key + f4 key simultaneously. If this doesn’t work, terminate the running task with Task Manager. If you’re unsure how to do this disconnect the Internet connection from the computer and shut down the PC. Reboot the machine into Safe Mode, No Networking, and try to uninstall any newly installed software. Another option is to restore the machine to its previous state with System Restore.

Another sure sign that you’ve been hacked is when your friends receive fake emails from your email account or your online password suddenly changes. Most of the time this happened because you may have responded to an email message yourself requiring you to update your settings, account information, or verify some other type of information. This is called Phishing. Hackers use this method because as many as 1 in 20 respond to the email. Take Action! If you are unsure who the email came from just delete it. It would be better that the individual contact you another way or validate that they actually sent you an email. You would think companies would stop sending this type of email themselves. Many hackers use this tactic because they can duplicate an email that looks very professional and very convincing. Never click on embedded links in emails. If you need to verify information manually type the companies URL into your browser and log into the official site. I recommend changing your password to be safe. Many people tend to use the same password for everything. So guessing one password means the hacker gets the keys to all of your other sites. Try using a passphrase. A passphrase is usually a sentence only you would know like, “I drive a 85 Ford Bronco.” To make it a password follow these steps; 1. Take out the spaces, 2. Capitalize each word, 3. Substitute letters for special characters or numbers, and 4. Use 8 to 15 characters. A final result might look like:
!Drive@85FordBr0nc0.

The most apparent sign that you’ve been hacked is noticing that your mouse moves between programs and makes correct selections. Sometimes your mouse may move by itself, it’s usually hardware related. But your mouse should never move by itself, and select to run particular programs. The only time that this should occur is if you have requested someone to take control of your system. Even in that case, you should know that who you are working with has been verified before they gain access. Take Action! If your computer suddenly comes alive, document it. Disconnect the computer from any networks (wired or wireless) and power off the system. This should be referred to a trained professional. Not taking this seriously can leave you a victim to identity theft, loss of money, or loss of property. I recommend completely restoring the machine, and changing your logon names and passwords using another known good computer immediately. If you notice that any of your accounts are missing money get law enforcement involved before restoring your machine so that a forensic image can be made of the hard drive.

I realize that all of this may seem overwhelming. Just be aware. Be vigilant. Understand that your electronic devices contain more information than you are realizing and that is really what the crooks want. That broadband connection you have is always on, always connected. Keep your system up to date. Most malicious hacking starts in one of three ways; unpatched software, running Trojan horse programs, and responding to fake phishing emails. There are the bold that use social engineering scams but those can even thwart the experts.

Using Excel: Building an Income Statement With Projections

Excel is perhaps the most important computer software program used in the workplace today. Many business professionals use Excel to perform everyday functional tasks in the workplace, and an increasing number of employers rely on Excel for decision support. The beauty of Excel is that it can be used as a receiver of business data, or as a calculator, a decision support tool, a data converter or even a display spreadsheet for information interpretation.

You might be asking what is Decision Support. A Decision Support System (DSS) is a computer-based information system that supports business or organizational decision-making activities. A DSS serves management, operations, and planning levels of an organization and helps to make informed decisions. Excel is an excellent tool to be used in this way.

I’ve developed a basic tool to demonstrate how to set up a basic Income Statement and develop a projection of figures based on user input. Basically, you would enter sales figures, cost of goods sold, and expenses. Excel will automatically calculate the gross profit and net income. Additionally, the projected periods will reflect assumptions that you can configure to meet your particular needs. Try it out and let me know what you think. Depending on your screen resolution you may need to adjust the viewing size to fit your screen.

Excel Income Statement with Projection Demo

Security Awareness – Beware Social Engineering Scams

Cyber Crime

Cyber Crime

In this new series of topics I will be covering Security Awareness. Many people might hear this term and think, “viruses.” However, Security Awareness is much more than that, and it impacts each one of us in a very real way. Some of you might even be thinking, “I hardly do anything on a computer.” Think again. According to survey data collected by the U.S. Census Bureau in 2011, 95% of adults 18 to 29 years old use the Internet, 87% for adults 30-49, 74% for adults 50-64, and 42% over the age 65. This number has grown considerably since then and has no sign of slowing down.

So what is Social Engineering and how is it used? This is a term that is used largely in the information technology circles but has been around in the social sciences industry for some time. Social Engineering, is a form of psychological manipulation where a person is tricked into divulging confidential information or used in a way to gain access to something they could not gain access to by themselves. Usually this manipulation may be used to gain access to your computer, phone, or building.  Tricking a person can happen in a  face-to-face(F2F) scenario where we may trust the individual more.  For example, your child tells you they need your credit card to simply enter the card information so that they can “play” a game on their game console (Xbox, Playstation, Wii).  Another example may be, when a familiar guest visits your home and asks for your wireless password to enter into their mobile device.  Most of the time these are harmless examples.  However, have you asked yourself, “Is their computer, phone, game console protected?” Social Engineering scams happen over the telephone, Internet, and even the Television!

Social Engineering scams will seem very legit.  That’s what makes them so dangerous.  They also do not necessarily try to gain access on their very first attempt.  Social Engineering scams can be compared to a jigsaw puzzle, not all of the pieces fit exactly together at first.  Each piece is a part of the larger picture, one piece connects to another and another until the picture is revealed. Sometimes callers will call a phone number over and over gathering small pieces of information each time. You may think, “Go ahead, I don’t have anything anyways.” Wrong again, your computer can act as a zombie computer that uses your broadband connection to broadcast messages that have been sent from India, China, or Russia. The power of these scams can send requests to servers at banks, hospitals, utility companies, and even governments. When enough zombies attack it can disable servers bringing down an entire operation.
Let me share a real life example that happened to me just recently (2014).  I had a caller that seemingly could verify information on my computer and they said they were calling from Microsoft.  Later, they identified themselves as a servicing company for Microsoft.  You can also Google the term: zfsendtotarget clsid trick to read other stories of Social Engineering in action.  After searching Google myself, I found another blogger who posted almost word-for-word what happened to me that happened to him back in 2010.  Visit Webologist to read his complete story to get the entire idea.  If it can happen to me, it can happen to you.  If you’re not a computer pro, imagine what you’ll believe.  I encourage you to read it.

Some of you reading this post, may still be thinking it can’t happen to you, but it normally does and you don’t even realize it. If you are one of the millions that use social media it’s happening already. Debt collectors, Employers, Past Relationships, and Law Enforcement all use social media to learn who your friends are, where you travel, who you associate with, and what your likes and dislikes are. That is the trick of Social Engineering Scams.  I’m not trying to say that Law Enforcement is trying to trick you but they use the same principles to catch terrorists and other criminals because it works.
Lastly, if you are one of the many who believe that anti-virus and anti-spyware programs completely protect your computer and data please think again.  These programs are only as good as you are when deterring and detecting malware infections.  For example, If you override just one setting, then you may be the one that opens the door to the vault, so to speak. I will continue to post on this topic because I know so many of my friends, family, co-workers, and acquaintances need to be continually reminded about what they post online, where they surf online, and what they believe is safe to download.

On my next post, I will cover how to watch for and prevent Social Engineering scams. Until next time, I invite your questions and encourage you to follow me.  Better yet, share my posts with your friends and family that need the help.

Cheers! PS

Connecting to VDI

The last lab scenario is to validate that the virtual machines have been created by the students.  However, in a real-world scenario, users would be able to use the Citrix Receiver application to broker and facilitate connecting to their desktop from a variety of devices (i.e., Tablet, Laptop, Smart Phone).  The Citrix services use an .ica extension, (Independent Computing Architecture).  
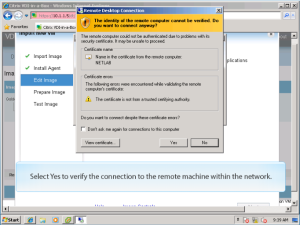
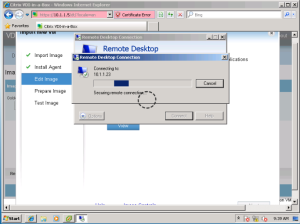
In the NETLAB+ environment, you will not be able to connect using this technology because it requires an Internet connection to broker the connection.  During the lab environment students must use a Remote Desktop Connection, formerly Terminal Services.  Remote Desktop Protocol, is a proprietary protocol developed by Microsoft, which provides a user with a graphical interface to connect to a computer over a network connection.  
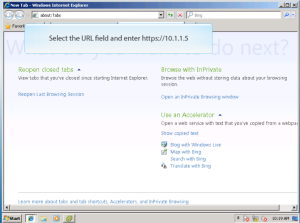
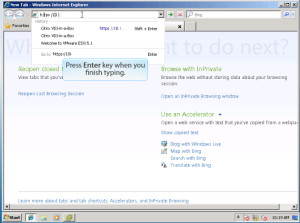
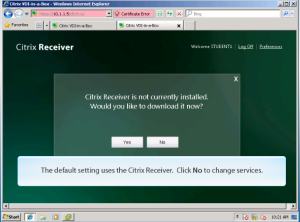
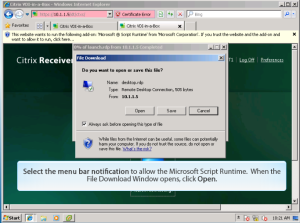
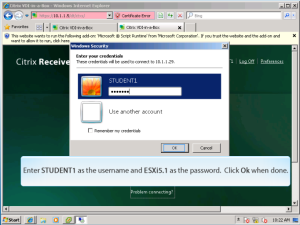
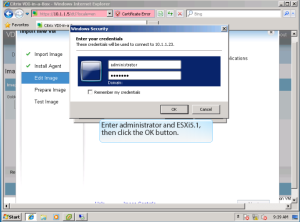
To establish a connection, open Internet Explorer and enter http://10.1.1.5. This address is the VDI Management Server.  Note that a real-world scenario would not allow user’s to enter a private address to connect to the VDI Management Server through HTTP, the Citrix Receiver would handle this brokering of services allowing a communication session to occur.  Once user credentials are correctly entered, authentication will occur and the user is prompted to use the Citrix Receiver.  

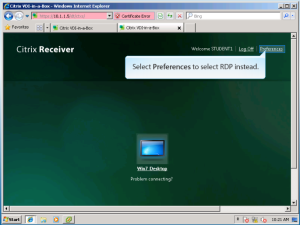
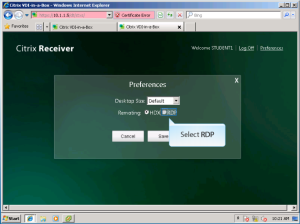
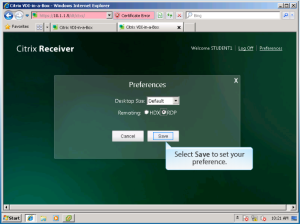
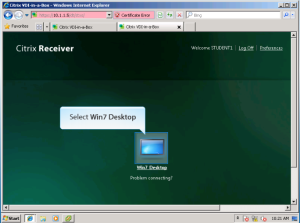
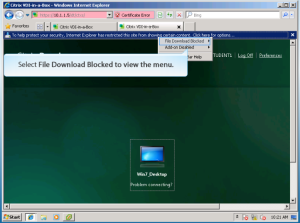
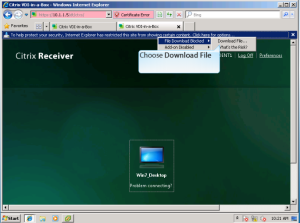
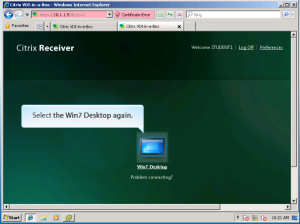
Change the default value by clicking Preferences at the top right corner of the browser window.  Select RDP in the Preferences window and be sure to click Save.  To refresh the session without using the browser’s refresh button, click the Win7 Desktop icon then allow the ActiveX download to occur.  Afterword’s, the user will be prompted through a series of dialog window’s that will offer to use RDP.  Follow the lab instructions for this lab carefully to ensure a successful connection is established. 

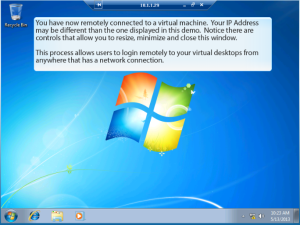
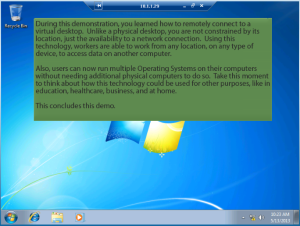
Unlike a physical desktop, there are no constraints by its location within a virtualized environment.  The only constraint is the availability to a network connection.  Using this type of technology, workers are able to work from any location, on any type of device, using different operating systems, to access data on another computer.  At the end of this lab take a moment to think about other ways that this technology could be deployed for different purposes, like education, healthcare, business, and within the home.

The complete demonstration can be found by clicking here.  The below step-by-step screen shots will provide instructions:

Capture 1 Connecting to VDI

Begin Instructions.


Capture 2 Connecting to VDI

Enter URL in Browser.


Capture 3 Connecting to VDI

Press Enter to launch.


Capture 4 Connecting to VDI

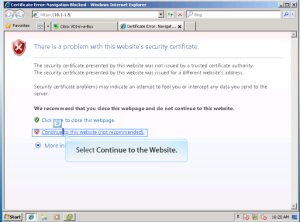
Continue to Website.


Capture 5 Connecting to VDI

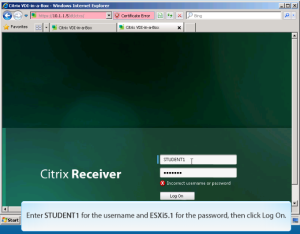
Enter user credentials.


Capture 6 Connecting to VDI

Click No to change services.


Capture 7 Connecting to VDI

Select Preferences.


Capture 8 Connecting to VDI

Select RDP.


Capture 9 Connecting to VDI

Select Save.


Capture 10 Connecting to VDI

Select Win7 Desktop Icon.


Capture 11 Connecting to VDI

Click notification message to download content.


Capture 12 Connecting to VDI

Select File Download.


Capture 13 Connecting to VDI

Choose Download File.


Capture 14 Connecting to VDI

Select Win7 Desktop Icon.


Capture 15 Connecting to VDI

Select notification.


Capture 16 Connecting to VDI

Click Connect.


Capture 17 Connecting to VDI

Enter user credentials.


Capture 18 Connecting to VDI

Remote connection established.


Capture 19 Connecting to VDI

Lab concludes.


VDI Administration

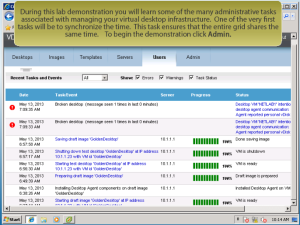
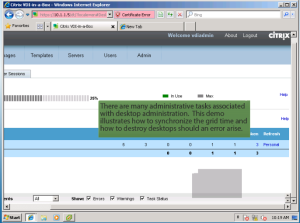
During this lab students will learn some of the many administrative tasks necessary to maintain the virtual infrastructure.  The lab will focus on a simple task of synchronizing the grid time.  This task ensures that the entire grid shares the same time, date, and time zone.  

It’s important to realize that there are many desktop tasks within a virtualized environment that are similar to maintaining a physical infrastructure, and these talking points may be covered during the learning session.  Not all administrative tasks are covered in the lab.  The aspect that students many immediately recognize is the time difference that it takes to manage one image rather than five physical computers.

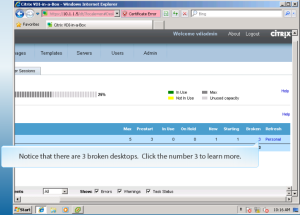
The complete demonstration can be found by clicking here.  The below step-by-step screen shots will provide instructions:

Capture 1 VDI Administration

Begin instructions.


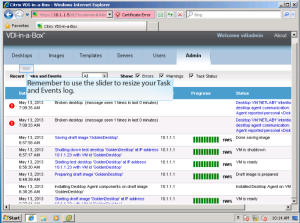
Capture 2 VDI Administration

Resizing Task and Events Log.


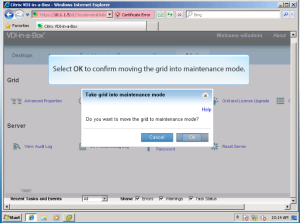
Capture 3 VDI Administration

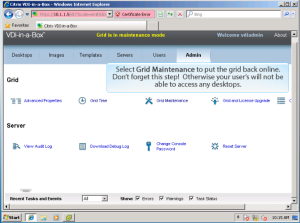
Enter maintenance mode.


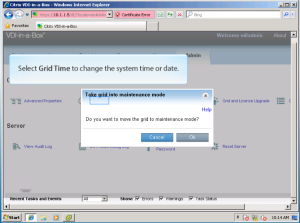
Capture 4 VDI Administration

Select Grid Time.


Capture 5 VDI Administration

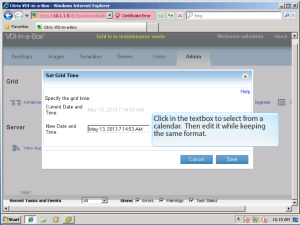
Enter date and time.


Capture 6 VDI Administration

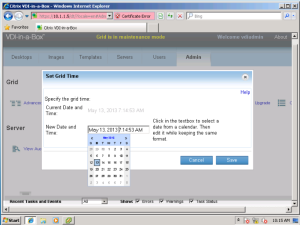
Select date from calendar.


Capture 7 VDI Administration

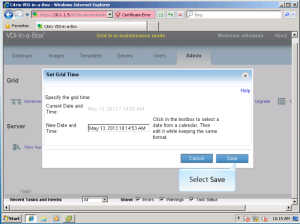
Save date and time modification.


Capture 8 VDI Administration

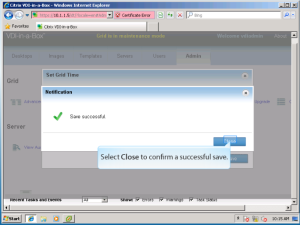
Close confirmation.


Capture 9 VDI Administration

Select Grid Maintenance.


Capture 10 VDI Administration

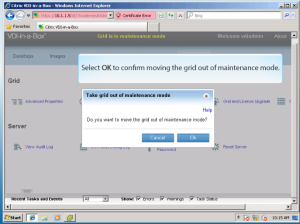
Take grid out of maintenance mode.


Capture 11 VDI Administration

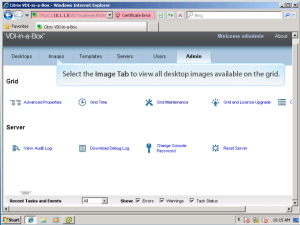
Select Image Tab.


Capture 12 VDI Administration

Select Published Link.


Capture 13 VDI Administration

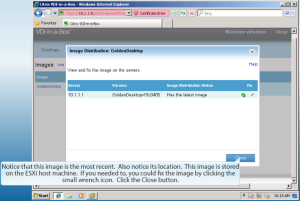
View and fix the image on servers.


Capture 14 VDI Administration

Select Desktops Tab.


Capture 15 VDI Administration

View capacity and desktops.


Capture 16 VDI Administration

Click to view broken desktops.


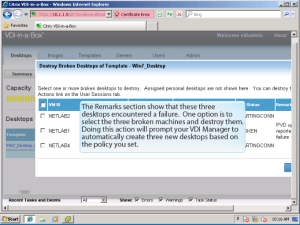
Capture 17 VDI Administration

Destroy broken desktops.


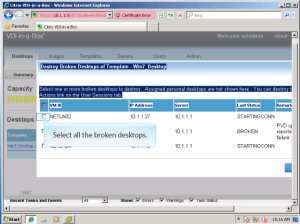
Capture 18 VDI Administration

Select all broken desktops.


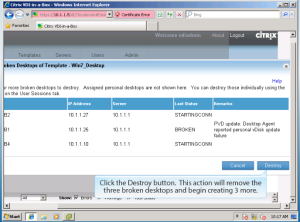
Capture 19 VDI Administration

Click Destroy button.


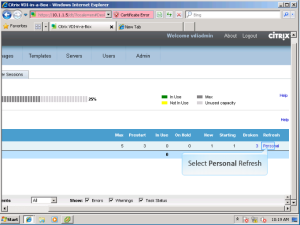
Capture 20 VDI Administration

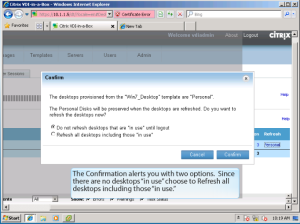
Select Personal Refresh.


Capture 21 VDI Administration

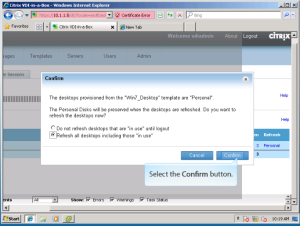
Confirm refresh.


Capture 22 VDI Administration

Refresh all desktops.


Capture 23 VDI Administration

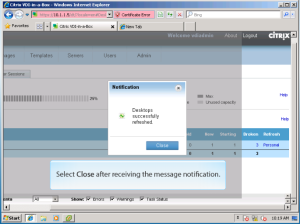
Close notification.


VDI Administration

Lab conclusion.


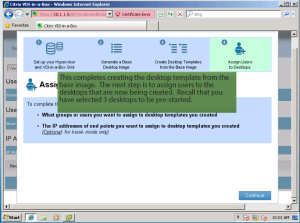
Assigning Users to VDI Grid

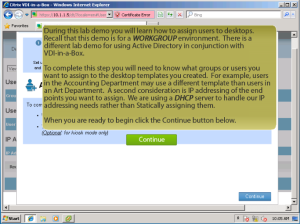
This exercise focuses on users of a Workgroup rather than users within Active Directory (AD).  VDI-in-a-Box does integrate with AD.  However, this is reserved for more advanced studies. 

To complete this lab, students will need to create a Group, create Users, and define an IP address scope.  Normally, these decisions would be much more in depth as organizational needs vary.  For example, users in the Accounting Department may use a different desktop template than users in an Art Department.  A second consideration is IP addressing of the end points.  Many organizations use VLAN’s to bolster security, increase usability, and improve network performance.  These topics are not covered during this session.  We are using a DHCP server to handle our IP addressing needs rather than statically assigning them. 

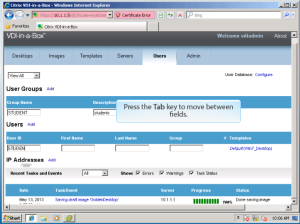
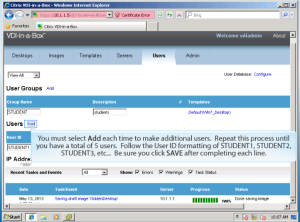
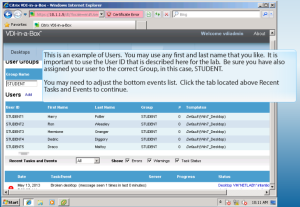
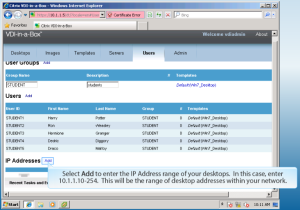
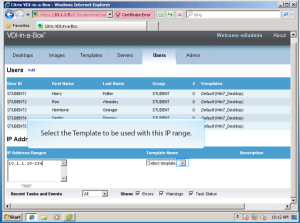
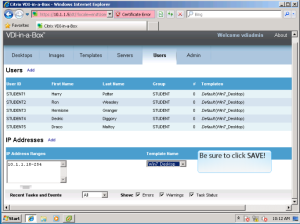
Students will create one user group named STUDENT.  Students will create five users starting with STUDENT1 and ending with STUDENT5.  First and Last names of the users can be anything the student wants to enter.  For example, Fred, Wilma, Barney, Betty, etc. The IP address range is 10.1.1.10-254. 

The complete demonstration can be found by clicking here.  The below step-by-step screen shots will provide instructions:


Capture 1 Assign Users to Grid

Beginning instructions.


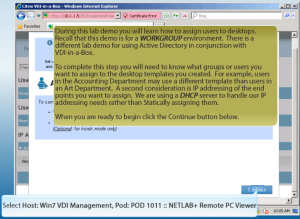
Capture 2 Assign Users to Grid

Continue to remote viewer.


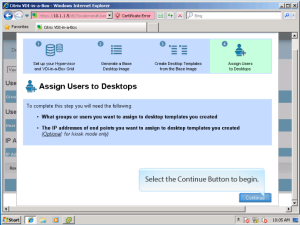
Capture 3 Assign Users to Grid

Assign users to desktops.


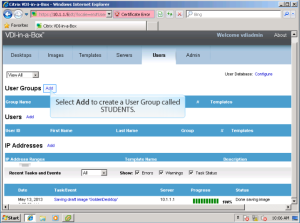
Capture 4 Assign Users to Grid

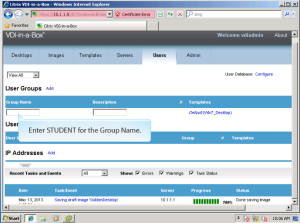
Add User Group.


Capture 5 Assign Users to Grid

Name Group.


Capture 6 Assign Users to Grid

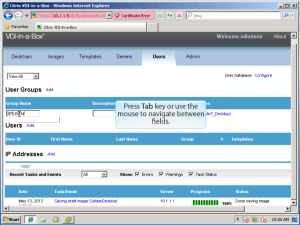
Tab to navigate fields.


Capture 7 Assign Users to Grid

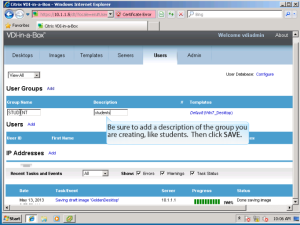
Group description.


Capture 8 Assign Users to Grid

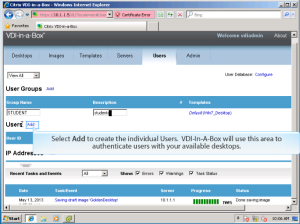
Add Users.


Capture 9 Assign Users to Grid

Tab to navigate.


Capture 10 Assign Users to Grid

Save after each added user.


Capture 11 Assign Users to Grid

Task and Events viewer.


Capture 12 Assign Users to Grid

Add IP Address scope.


Capture 13 Assign Users to Grid

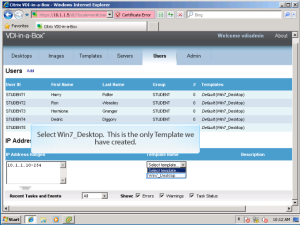
Select Template for grid.


Capture 14 Assign Users to Grid

Drop menu selection.


Capture 15 Assign Users to Grid

Save IP Address scope and template selection.


Capture 16 Assign Users to Grid

Conclusion of lab.

Generate a Template

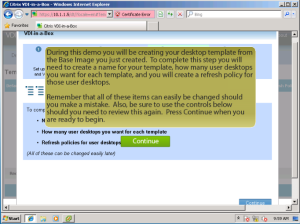
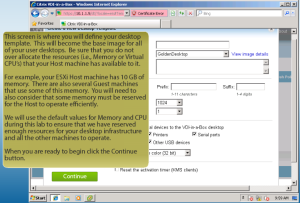
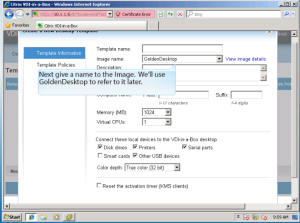
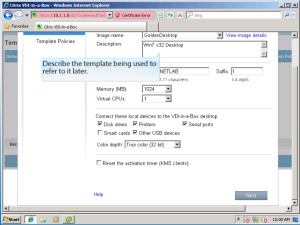
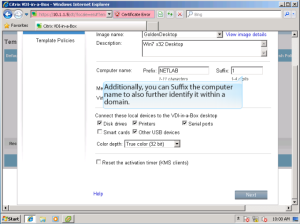
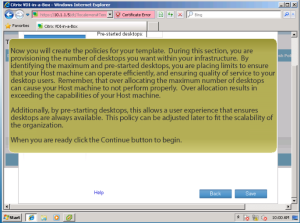
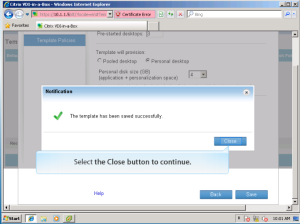
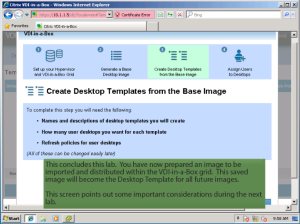
Students will create their desktop template from the Base Image they completed during the Generate a Base Image instruction.  To complete this step students will be naming their template and developing a policy to determine the maximum number of virtual machines within the VDI grid and setting a policy for Start-up virtual machines that are available dynamically.


In this environment, many decisions have been pre-planned on the students behalf.  It should be noted for consideration that there are limitations to the number of virtual machines that can be hosted within VDI-in-a-Box.  These limitations are largely based upon available resources within the Host Server.  For example, the virtual ESXi host has 10GB of system memory.  Within the virtual host, several guest machines are installed and running.  The VDI Management Server, the ADDS/DHCP Server running Windows 2008 R2, and a Windows 7 Desktop uses a portion of the host resources.  Therefore, consideration must be made to the number of future virtual machines that can be created within the VDI grid because of the finite amount of resources available to the Host.  The limitations during this lab are set lower because labs are performed in a virtual environment.  This virtual environment consists of nested virtual machines.  In a production environment, the limitations are based upon the physical host as well.


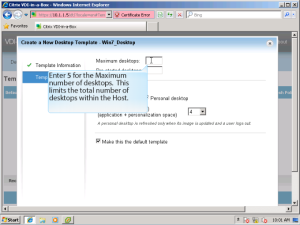
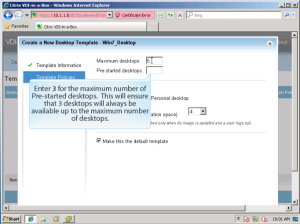
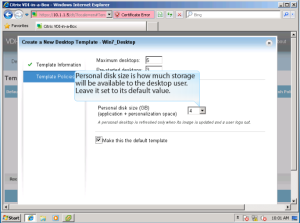
We will use the default values for Memory and CPU cores during this lab to ensure that we have reserved enough resources for the desktop infrastructure and to maintain operations of the ESXi host and guest machines.  Students will create a Maximum of 5 virtual machines. (During the lab a maximum of 5 are used with 3 pre-started.) Additional time may be used to experiment with different levels of virtual machines. (Exceeding 7 virtual machines with its current configuration will cause the ESXi host to continuously build and destroy the virtual infrastructure as it will not have enough resources to support the VM’s).

To watch the entire demonstration first click here.  Below are the step-by-step screen shots (instructions):


Capture 1 Generate a Template

Demo instructions


Capture 2 Generate a Template

Define the desktop template.


Capture 3 Generate a Template

Name template.


Capture 4 Generate a Template

Name Image.


Capture 5 Generate a Template

Describe the template.


Capture 6 Generate a Template

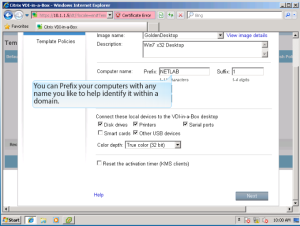
Assign Prefix and Suffix to guest machines.


Capture 7 Generate a Template

Prefix/ Suffix Identification.


Capture 8 Generate a Template

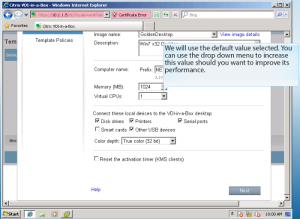
Assign default values.


Capture 9 Generate a Template

Memory and CPU values.


Capture 10 Generate a Template

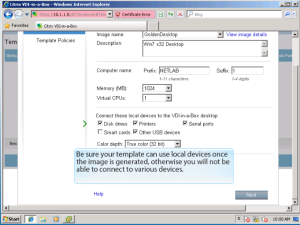
Attach local devices.


Capture 11 Generate a Template

Assign color depth.


Capture 12 Generate a Template

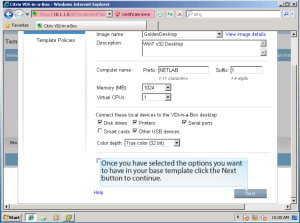
Option completion.


Capture 13 Generate a Template

Create policy instructions.


Capture 14 Generate a Template

Assign maximum desktops.


Capture 15 Generate a Template

Assign pre-start desktops.


Capture 16 Generate a Template

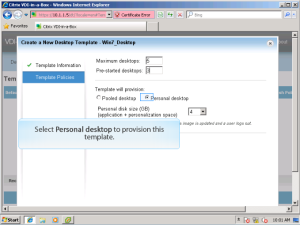
Personal desktop provision.


Capture 17 Generate a Template

Assign disk size.


Capture 18 Generate a Template

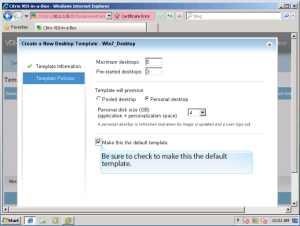
Default template selection.


Capture 19 Generate a Template

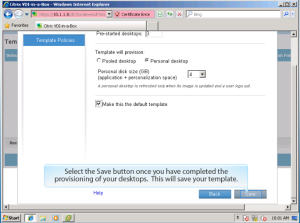
Save to complete provisioning.


Capture 20 Generate a Template

Template build process.


Capture 21 Generate a Template

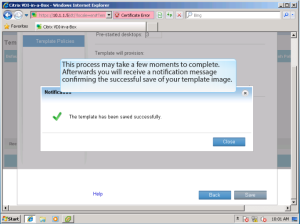
Template creation notification.


Capture 22 Generate a Template

Lab completion.

Generating a Base Image

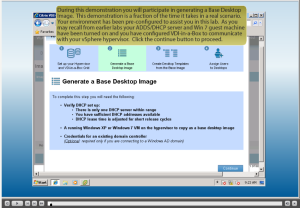
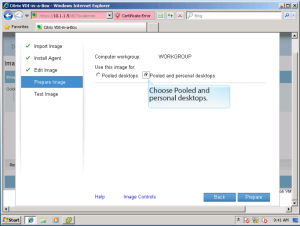
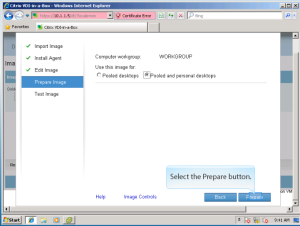
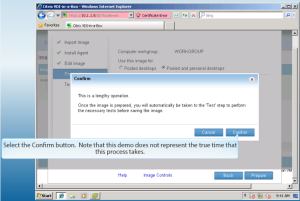
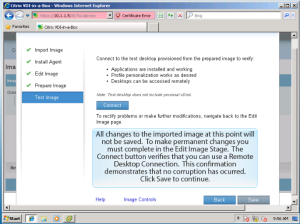
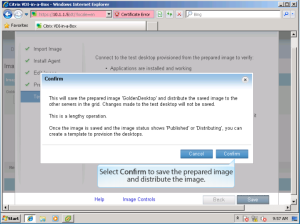
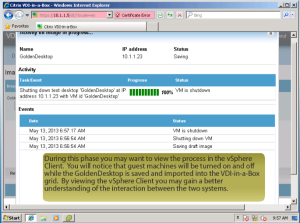
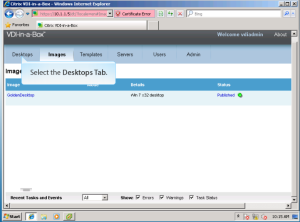
This lab is centered on the generation of a Base Desktop Image. Note: the lab demo does not reflect the amount of time necessary to complete the entire process.

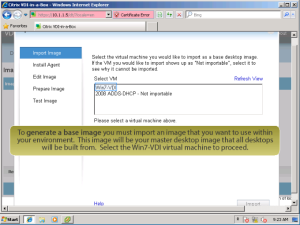
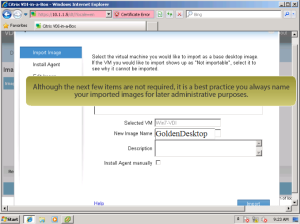
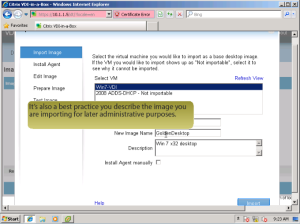
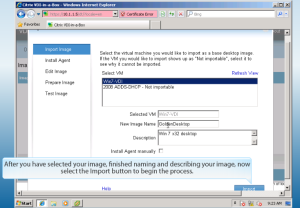
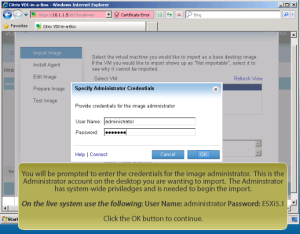
The environment has been pre-configured to assist the student with completing the lab. To complete this lab, the ADDS/DHCP server and Windows 7 guest machines must be powered on, and the student has configured the VDI Manager to communicate with the vSphere hypervisor (Hypervisor Grid Configuration). Importing a VM into VDI-in-a-Box is a lengthy process. The image that is imported into the VDI-in-a-Box grid will be the Master Desktop Image that all desktops will be built from to create a desktop template. When prompted, the student will enter the Administrator Credentials for the Windows 7 VM.

The lab demonstration will reflect an IP address for the Windows 7 machine within the scope of 10.1.1.10-254. Each student may have a different IP address for the Windows 7 guest machine as it is configured as a DHCP client. If your Windows 7 guest machine does not get an IP address, ensure that the DHCP server (VM) on the ESXi host is powered on.

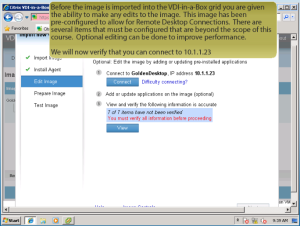
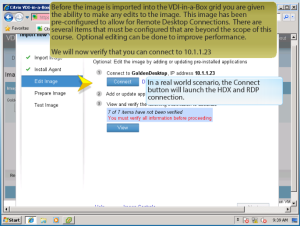
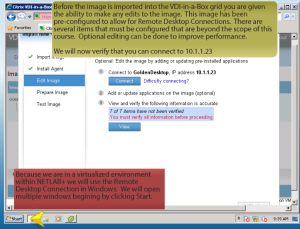
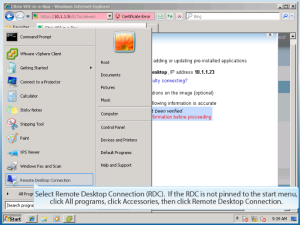
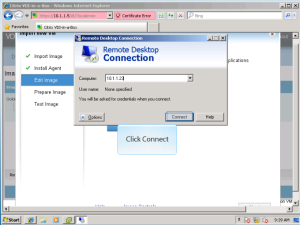
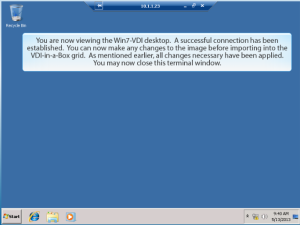
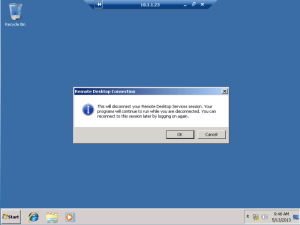
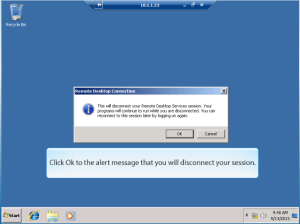
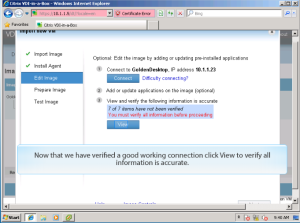
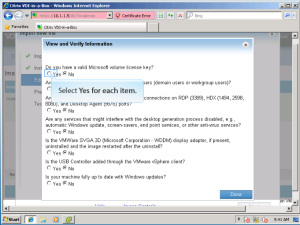
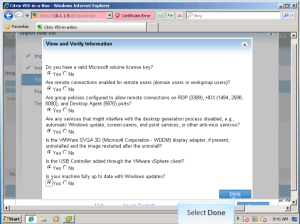
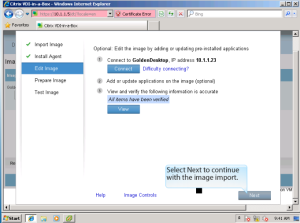
To reinforce the concept that the Master Image is a working machine, we recommend Remote Desktop Connections should be established during the Edit Image step. Caution should be used not to close the wrong window, otherwise the student may need to completely log back into NETLAB+. It should be stressed to the student to continually ask themselves, “Where am I?” By focusing their attention to which window they are operating in. Many students may feel overwhelmed with the number of open Windows or Consoles controlling a number of different machines.

Generate a Base Desktop Image

Generate a Base Desktop Image

Capture 2 Step 2

Capture 2 Step 2

Capture 3 Step 3

Capture 3 Step 3

Capture 4 Step 4

Capture 4 Step 4

Capture 5 Step 5

Capture 5 Step 5

Capture 6 Step 6

Capture 6 Step 6

Capture 7 Step 7

Capture 7 Step 7

Capture 8 Step 8

Capture 8 Step 8

Capture 9 Step 9

Capture 9 Step 9

Capture 10 Step 10

Capture 10 Step 10

Capture 11 Step 11

Capture 11 Step 11

Capture 12 Step 12

Capture 12 Step 12

Capture 13 Step 13

Capture 13 Step 13

Capture 14 Step 14

Capture 14 Step 14

Capture 15 Step 15

Capture 15 Step 15

Capture 16 Step 16

Capture 16 Step 16

Capture 17 Step 17

Capture 17 Step 17

Capture 18 Step 18

Capture 18 Step 18

Capture 19 Step 19

Capture 19 Step 19

Capture 20 Step 20

Capture 20 Step 20

Capture 21 Step 21

Capture 21 Step 21

Capture 22 Step 22

Capture 22 Step 22

Capture 23 Step 23

Capture 23 Step 23

Capture 24 Step 24

Capture 24 Step 24

Capture 25 Step 25

Capture 25 Step 25

Capture 26 Step 26

Capture 26 Step 26

Capture 27 Step 27

Capture 27 Step 27

Capture 28 Conclusion

Capture 28 Conclusion

To view a complete demo click here.